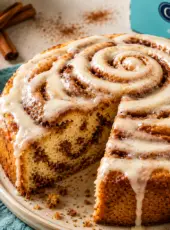
Christmas Tree Cream Cheese Danish is an amazing and festive treat that embodies the spirit of the holiday season. This delightful pastry, shaped like a Christmas tree, is filled with sweet cream cheese and topped with a luscious glaze. Each bite offers a harmonious blend of flaky pastry and creamy filling, making it a perfect centerpiece for your holiday breakfast or brunch. The unique shape and rich flavors will undoubtedly impress your family and friends, creating wonderful memories around the holiday table.
Imagine waking up to the aroma of freshly baked pastries, the excitement in the air as you gather with loved ones, and the joy of sharing something special. This Christmas Tree Cream Cheese Danish transforms ordinary moments into extraordinary ones. It’s not just a recipe; it’s an experience that brings people together. Whether you’re an experienced baker or a novice in the kitchen, this recipe is easy to follow and yields impressive results.
In this guide, you’ll discover why this Christmas Tree Cream Cheese Danish is a must-try, how to make it step by step, and tips for serving it beautifully. So, roll up your sleeves and get ready to create a festive masterpiece that will become a cherished holiday tradition for years to come!
Why You’ll Love This Recipe
The Christmas Tree Cream Cheese Danish combines simplicity and elegance, making it a delightful addition to your holiday celebrations. Here are several reasons why you will fall in love with this recipe:
1. Festive Presentation – The Christmas tree shape is visually stunning and adds a festive touch to any holiday gathering.
2. Delicious Filling – The cream cheese filling is rich, creamy, and slightly tangy, perfectly complementing the sweet pastry.
3. Easy to Make – The recipe is straightforward, with simple steps that yield impressive results, even for beginner bakers.
4. Versatile Flavor Options – Feel free to customize the filling with your favorite flavors, such as chocolate chips or fruit preserves.
5. Perfect for Sharing – This Danish is not only great for breakfast but also makes a lovely dessert or snack to share with friends and family.
6. A Holiday Tradition – Making this pastry can become a cherished tradition, allowing you to create lasting memories with loved ones.
With these enticing qualities, it’s no wonder the Christmas Tree Cream Cheese Danish has become a holiday favorite. Each bite will remind you of the joy and warmth that the season brings!
Preparation and Cooking Time
Making the Christmas Tree Cream Cheese Danish is a delightful experience that requires some time, but the results are well worth it. Here’s a breakdown of the time needed:
– Preparation Time: 30 minutes
– Cooking Time: 25-30 minutes
– Cooling Time: 15-20 minutes
Total time required is approximately 1 hour and 15 minutes. This includes the time for assembling the pastry, baking it to golden perfection, and allowing it to cool before serving.
Ingredients
– 1 package (8 oz) cream cheese, softened
– 1/4 cup granulated sugar
– 1 teaspoon vanilla extract
– 1 package (2 sheets) puff pastry, thawed
– 1 egg, beaten (for egg wash)
– 1 cup powdered sugar (for glaze)
– 2 tablespoons milk (for glaze)
– Green and red sprinkles (for decoration)
Step-by-Step Instructions
Creating the Christmas Tree Cream Cheese Danish is simple when you follow these steps:
1. Preheat the Oven: Preheat your oven to 400°F (200°C). Line a baking sheet with parchment paper.
2. Prepare the Filling: In a medium bowl, mix the softened cream cheese, granulated sugar, and vanilla extract until smooth and creamy.
3. Roll Out Puff Pastry: On a lightly floured surface, roll out one sheet of puff pastry into a rectangle, about 12×16 inches.
4. Cut the Tree Shape: Place the rolled pastry onto the prepared baking sheet. Use a sharp knife to cut a Christmas tree shape, leaving a trunk at the bottom. Make cuts from the top to the trunk, leaving the center intact.
5. Add the Filling: Spread the cream cheese mixture evenly over the center of the pastry, avoiding the cut edges.
6. Fold the Branches: Starting from the top, fold each cut branch over the filling, alternating sides to create a tree-like appearance.
7. Apply Egg Wash: Brush the entire pastry with the beaten egg for a golden finish.
8. Bake: Place the baking sheet in the preheated oven and bake for 25-30 minutes, or until the pastry is puffed and golden brown.
9. Cool: Remove from the oven and allow the Danish to cool on the baking sheet for 15-20 minutes.
10. Prepare the Glaze: In a small bowl, mix the powdered sugar and milk until smooth. Adjust the consistency as needed.
11. Glaze the Danish: Drizzle the glaze over the cooled pastry and top with green and red sprinkles for a festive touch.
How to Serve
To make your Christmas Tree Cream Cheese Danish even more special, consider these serving tips:
1. Presentation: Place the Danish on a decorative platter or cake stand to showcase its beautiful shape.
2. Accompaniments: Serve with fresh fruit, such as strawberries or raspberries, and a side of whipped cream for added indulgence.
3. Pair with Beverages: Offer coffee, hot chocolate, or a festive holiday punch to complement the sweet flavors of the pastry.
4. Slice Generously: Cut the Danish into slices, ensuring each piece includes some of the delicious cream cheese filling.
5. Leftover Storage: If you have leftovers, store them in an airtight container in the refrigerator for up to three days. Reheat in the oven for a few minutes before serving.
By incorporating these serving ideas, you’ll create a delightful experience that will leave your guests raving about your Christmas Tree Cream Cheese Danish!
Additional Tips
– Use Fresh Ingredients: Using fresh cream cheese and quality puff pastry will enhance the flavor of your Christmas Tree Cream Cheese Danish. Ensure that your ingredients are at room temperature for the best mixing results.
– Experiment with Flavors: While the classic cream cheese filling is delightful, consider adding zest from a lemon or orange for a refreshing twist. Spices such as cinnamon or nutmeg can also elevate the flavor profile.
– Keep the Pastry Cold: Puff pastry works best when kept cold. If it begins to warm up during preparation, pop it back into the refrigerator for a few minutes to maintain its flakiness.
– Serve Warm: For the best experience, serve the Danish warm. This enhances the cream cheese filling’s creaminess and makes the pastry even more enjoyable.
– Make Ahead: If you’re short on time, you can prepare the Danish the night before. Assemble it and keep it covered in the fridge. Just bake it the next morning for a fresh, warm treat.
Recipe Variation
Feel free to get creative with your Christmas Tree Cream Cheese Danish! Here are some fun variations to explore:
1. Chocolate Chip Filling: Add mini chocolate chips to the cream cheese mixture for a sweet surprise in every bite.
2. Fruit Preserves: Swirl in your favorite fruit preserves, like raspberry or apricot, into the cream cheese filling for a fruity flavor.
3. Nutty Delight: Incorporate chopped nuts, such as pecans or walnuts, into the filling for added texture and flavor.
4. Glazed Fruit Topping: Top the finished Danish with a layer of glazed fruit for a colorful and festive presentation.
5. Savory Option: For a savory twist, consider using a mixture of cream cheese, garlic, and herbs. Shape it like a tree for a unique appetizer.
Freezing and Storage
– Storage: Store leftover Christmas Tree Cream Cheese Danish in an airtight container in the refrigerator. It keeps well for about 3 days.
– Freezing: If you want to make it in advance, you can freeze the assembled but unbaked Danish. Wrap it tightly in plastic wrap and aluminum foil. It can be frozen for up to 2 months. When ready to bake, thaw it in the refrigerator overnight, then follow the baking instructions.
– Reheating: For the best texture, reheat leftover Danish in the oven at 350°F (175°C) for about 10 minutes to restore its flaky goodness.
Special Equipment
To prepare your Christmas Tree Cream Cheese Danish, you’ll need a few essential kitchen tools:
– Rolling Pin: For rolling out the puff pastry to the desired thickness.
– Sharp Knife or Pizza Cutter: To cut the tree shape and branches of the Danish.
– Baking Sheet: A large baking sheet lined with parchment paper to prevent sticking.
– Mixing Bowls: For mixing the cream cheese filling and glaze.
– Pastry Brush: To apply the egg wash for a golden finish.
– Cooling Rack: To allow the Danish to cool evenly after baking.
Frequently Asked Questions
Can I use store-bought cream cheese?
Yes, store-bought cream cheese works perfectly for this recipe. Just ensure it’s softened before mixing.
How do I know when my Danish is baked?
The Danish is done when it is puffed and golden brown. You can also check the bottom; it should be firm and lightly browned.
Can I make this Danish vegan?
Yes! Substitute the cream cheese with a vegan cream cheese alternative and use a plant-based milk for the glaze.
What if I don’t have puff pastry?
You can use crescent roll dough as an alternative, though the texture will differ slightly.
How can I add more color to the glaze?
You can incorporate a few drops of food coloring into the glaze for a more festive look.
Conclusion
The Christmas Tree Cream Cheese Danish is not only a treat for the taste buds but also a beautiful addition to your holiday celebrations. Its festive shape and delicious filling make it a wonderful centerpiece for any gathering. Whether enjoyed for breakfast or as a sweet snack, this Danish is sure to become a cherished holiday tradition. With simple ingredients and easy steps, anyone can create this delightful pastry. So gather your loved ones, roll up your sleeves, and make this holiday season memorable with your very own Christmas Tree Cream Cheese Danish!

Christmas Tree Cream Cheese Danish: An Incredible Ultimate Recipe
- Total Time: 42 minute
Ingredients
– 1 package (8 oz) cream cheese, softened
– 1/4 cup granulated sugar
– 1 teaspoon vanilla extract
– 1 package (2 sheets) puff pastry, thawed
– 1 egg, beaten (for egg wash)
– 1 cup powdered sugar (for glaze)
– 2 tablespoons milk (for glaze)
– Green and red sprinkles (for decoration)
Instructions
Creating the Christmas Tree Cream Cheese Danish is simple when you follow these steps:
1. Preheat the Oven: Preheat your oven to 400°F (200°C). Line a baking sheet with parchment paper.
2. Prepare the Filling: In a medium bowl, mix the softened cream cheese, granulated sugar, and vanilla extract until smooth and creamy.
3. Roll Out Puff Pastry: On a lightly floured surface, roll out one sheet of puff pastry into a rectangle, about 12×16 inches.
4. Cut the Tree Shape: Place the rolled pastry onto the prepared baking sheet. Use a sharp knife to cut a Christmas tree shape, leaving a trunk at the bottom. Make cuts from the top to the trunk, leaving the center intact.
5. Add the Filling: Spread the cream cheese mixture evenly over the center of the pastry, avoiding the cut edges.
6. Fold the Branches: Starting from the top, fold each cut branch over the filling, alternating sides to create a tree-like appearance.
7. Apply Egg Wash: Brush the entire pastry with the beaten egg for a golden finish.
8. Bake: Place the baking sheet in the preheated oven and bake for 25-30 minutes, or until the pastry is puffed and golden brown.
9. Cool: Remove from the oven and allow the Danish to cool on the baking sheet for 15-20 minutes.
10. Prepare the Glaze: In a small bowl, mix the powdered sugar and milk until smooth. Adjust the consistency as needed.
11. Glaze the Danish: Drizzle the glaze over the cooled pastry and top with green and red sprinkles for a festive touch.
- Prep Time: 30 minutes
- Cook Time: 25-30 minutes
Nutrition
- Serving Size: 8
- Calories: 320 kcal
- Fat: 20g
- Protein: 5g